

How to Brew Professional Coffee at Home: 2026 Guide
Table of Contents
- What You'll Need to Brew Professional Coffee
- How to Measure Coffee for Consistent Professional Results
- Coffee Grind Size Chart: Matching Grind to Brew Method
- Water Temperature for Brewing Coffee: The 90-96°C Range
- Step-by-Step: How to Brew Professional Coffee with a Pour-Over
- Bean Freshness and Degassing: What Competitors Skip
- Common Mistakes That Ruin Professional Coffee at Home
- Frequently Asked Questions
Last Updated: September 28, 2026
What You'll Need to Brew Professional Coffee
- Burr grinder (hand or electric) for even grind consistency
- Digital scale accurate to 0.1 g, for repeatable brew ratios
- Gooseneck kettle with temperature control, or a thermometer
- Timer (your phone works)
- Filter paper matched to your dripper, or a metal filter for immersion methods
- Fresh whole beans, ideally roasted within the last few weeks
A clean setup also matters: rinse your filter with hot water before brewing to remove paper taste and preheat the vessel.
How to Measure Coffee for Consistent Professional Results
Professional coffee depends on a repeatable brew ratio, not intuition. The standard starting point is 1:15 to 1:17, meaning one part coffee by weight to 15-17 parts water. For a single 250 ml cup, that's roughly 15 g of coffee to 250 g of water.
| Brew Method | Coffee (g) | Water (ml) | Ratio | Typical Yield |
|---|---|---|---|---|
| Pour-over (single cup) | 15 | 250 | 1:16.7 | 1 cup |
| Pour-over (two cups) | 30 | 500 | 1:16.7 | 2 cups |
| French press | 30 | 500 | 1:16.7 | 2 cups |
| AeroPress | 15 | 220 | 1:14.7 | 1 strong cup |
| Moka pot | 18 | 200 | 1:11 | 1 concentrated cup |
Coffee Grind Size Chart: Matching Grind to Brew Method
The correct grind size depends on how long water contacts the coffee: longer contact needs a coarser grind, shorter contact a finer one. Match the two and extraction falls into place.
| Brew Method | Grind Size | Texture Reference | Contact Time |
|---|---|---|---|
| French press | Coarse | Sea salt | 4 minutes |
| Drip coffee | Medium | Table salt | 4-6 minutes |
| Pour-over | Medium-fine | Fine sand | 2.5-3 minutes |
| AeroPress | Fine | Table salt to fine | 1-2 minutes |
| Moka pot | Fine | Powdered sugar | 2-3 minutes |
| Espresso | Very fine | Flour | 25-30 seconds |
Water Temperature for Brewing Coffee: The 90-96°C Range
Water temperature for brewing coffee should sit between 90°C and 96°C for most methods. Water that is too cool under-extracts, leaving the cup sour and weak. Water that is too hot scalds the grounds and pulls out harsh, bitter compounds.
Why Water Chemistry Matters More Than Most Brewers Realize
Two minerals do most of the work:
- Magnesium binds to coffee's flavor compounds and pulls them into solution. It is the primary driver of extraction efficiency and sweetness.
- Calcium plays a supporting role, contributing to body and a rounder mouthfeel.
In the right range, extraction is even and the cup tastes complete. Too low, as in distilled or heavily softened water, and the water under-extracts, producing a flat, hollow cup no matter your technique. Too high and it over-extracts, turning the cup bitter and chalky.
The Alkalinity Problem
Alkalinity (bicarbonate content) buffers pH change. High-alkalinity water neutralizes coffee's natural acidity, muting the bright, fruity notes of light roasts. This is why the same beans taste vibrant at one café and dull at another, the water is doing the talking.
- Total hardness around 50-175 ppm (as CaCO₃)
- Alkalinity around 40-70 ppm
- pH near neutral (roughly 7)
You do not need a lab to get close:
- Start with filtered tap water. A simple carbon filter removes chlorine and some sediment, which is the single biggest improvement most home brewers can make.
- Try bottled water labeled 'spring' rather than 'purified' or 'distilled.' Spring water typically retains the minerals coffee needs; purified and distilled water have had them stripped out.
- If you want precision, use a remineralization packet or a third-wave water recipe. These let you build brewing water from distilled water plus a measured mineral blend, which is what many competition baristas do.
Matching Water to Roast Level
Lighter roasts benefit from higher mineral content and lower alkalinity, letting acidity and fruit notes come through. Darker roasts do better with moderate minerals and slightly more alkalinity, rounding off sharp edges. If you change nothing else, changing your water is often the most dramatic single upgrade available.
Step-by-Step: How to Brew Professional Coffee with a Pour-Over
Pour-over brewing rewards attention to detail. Follow these steps for a clean, bright cup that shows off the character of the beans.
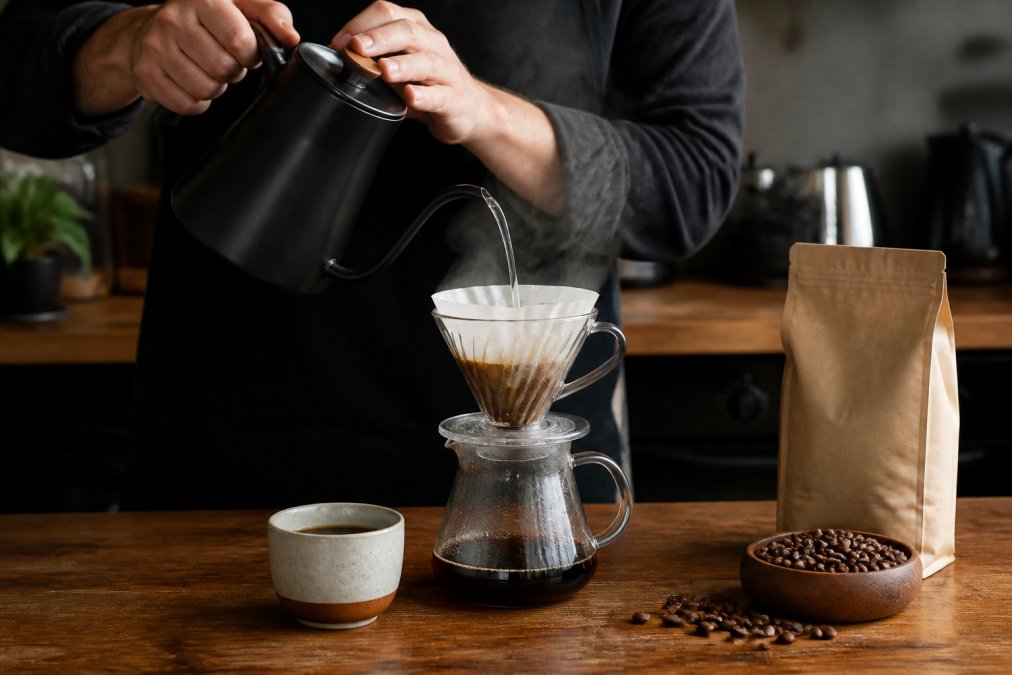
Total time: About 4 minutes. Difficulty: Beginner.
- Heat water to 93°C and rinse your paper filter with hot water. Discard the rinse water.
- Weigh 15 g of coffee and grind it medium-fine, about the texture of fine sand.
- Add grounds to the dripper and place it on your scale. Tare to zero.
- Bloom the coffee by pouring about 45 g of water, just enough to saturate the grounds. Wait 30-40 seconds. The bed will puff and bubble as trapped gas escapes.
- Pour in slow circles from the center outward, adding water in stages up to 250 g total. Keep the water level steady and avoid pouring down the filter edges.
- Let it drain fully. Total brew time should land around 2.5 to 3 minutes.
- Swirl and serve in a preheated mug.
Bean Freshness and Degassing: What Competitors Skip
Freshness is the variable most brewing guides ignore, and it changes everything. Beans release carbon dioxide for days after roasting, degassing. Brew too soon and the gas disrupts water contact with the grounds, producing a flat, uneven cup.
Common Mistakes That Ruin Professional Coffee at Home
Most home brews fail for predictable reasons, but knowing the list is not the same as knowing which mistake is ruining your cup. The professional skill is diagnosis: taste the cup, identify the fault, adjust the right variable.
Accent Coffee Mug (11, 15oz) →
Diagnose by Taste
Sour, sharp, or weak-tasting cup, This is under-extraction. Water moved through the grounds too quickly or did not pull enough out of them. Common causes:
-
Grind too coarse for the method. Tighten the grind one notch and re-brew.
-
Water temperature too low. Aim for the higher end of the 90-96°C range.
-
Brew time too short. For pour-over, target 2.5-3 minutes total; if it finishes in under 2 minutes, the grind is likely too coarse.
-
Ratio too loose. If you are at 1:17, try 1:15.
-
Grind too fine. Loosen it one notch.
-
Water temperature too high, especially with dark roasts. Drop toward 90°C.
-
Brew time too long. If your pour-over stalls past 3.5 minutes, the grind is likely too fine.
-
Ratio too tight. If you are at 1:14, try 1:16.
The Non-Negotiable Habits
- Weigh your coffee and water in grams. Volume scoops vary by several grams depending on bean density and roast level, which throws off your ratio before you even start.
- Grind fresh, right before brewing. Pre-ground coffee loses aromatic compounds within hours and its particle size is fixed for one method only.
- Bloom the coffee. Pour about twice the coffee's weight in water, wait 30-40 seconds, then continue. Skipping this traps carbon dioxide in the bed and produces an uneven extraction.
- Rinse your filter. Hot water through a paper filter removes paper taste and preheats the vessel.
- Clean your equipment. Residual oils turn rancid and taint every subsequent cup. Rinse your dripper and grinder regularly; a deep clean with coffee-specific detergent every few weeks keeps flavors honest.
One more habit separates good from great: taste deliberately. Note whether the cup leans sour, bitter, or balanced, then adjust one variable next time. That feedback loop, not any single piece of gear, turns home brewing into professional coffee.
Frequently Asked Questions
How to make coffee with a professional coffee machine?
Professional machines maintain water at 90-96°C and use a pump for consistent pressure. For home use, a pour-over setup can mimic this. Start by weighing 15g of freshly ground coffee (medium-fine), heat water to 93°C, and use a 1:15 ratio. Bloom with 30g of water for 30 seconds, then pour in slow circles. Total brew time should be 2:30-3:00. This method gives you control over grind size, water temperature, and agitation, just like a barista.
What is the ideal water-to-coffee ratio for professional brewing?
The golden ratio is 1:15 to 1:17 coffee to water by weight. For a standard 240ml cup, use 15g of coffee and 225ml of water. This ratio ensures proper extraction without bitterness or sourness. Adjust slightly: use 1:15 for a bolder cup, 1:17 for a lighter one. Always use a scale; volume measurements like scoops are inconsistent. For professional coffee, precision matters more than speed.
How does grind size affect the quality of home-brewed coffee?
Grind size controls extraction speed. Too coarse (like sea salt) leads to under-extraction: sour, weak coffee. Too fine (like powdered sugar) causes over-extraction: bitter, harsh flavors. For pour-over, aim for medium-fine (like table salt). For French press, use coarse. A burr grinder provides consistent particles, which is essential for professional coffee. Check a coffee grind size chart to match your method.
What is the 4-6 method for coffee?
The 4-6 method, popularized by Tetsu Kasuya, divides pouring into five stages. You pour 40% of water in the first two pours (for sweetness and acidity), then 60% in three pours (for strength). For a 300ml brew, first pour 60g, wait 45 seconds, pour another 60g, then at 1:30 pour 60g, at 2:00 pour 60g, and at 2:30 pour 60g. Total time: 3:30. This method gives you control over flavor balance.